STEM Sections

Monday, October 6, 2014

Lego EV3s

For the past couple of weeks, my classes have been using the EV3s.  This is the second year that I have taught with these and I have learned more each time I have opened the software.  I did things a little differently this year since half of my students already did the beginning lessons last year.

My 5th grade students worked through the lessons in the Robot Educator section.  We did the first module together so I could teach them about the parameters, values, and modes.  This gave them good groundwork to begin programming on their own.  Working in pairs, the 5th graders began with programming their robot to move in a straight line.  The lessons are set up in 5 easy to follow steps:

1. watch a video of what your robot should be doing
2. build the robot, if it is not already done
3. rewatch the video, but paying attention to the animated programming blocks
4. copy the programming that Lego gives to you
5. Modify the original programming by experimenting with different programming blocks

Step 5 is my favorite because this is where real inquiry begins.  The students must modify their programming by using additional blocks to make the robot complete a task.  For instance, in the "curved move" module, the students then had to add three blocks to get the robot back to its starting position.  It is a trial and error process that allows me to see who really understands the programming basics and who needs a little more help. Frustration is often high on step 5, but my students have been able to work through it to be successful. 

I like setting the program up this way because it allows my students to work at their own pace.  Some students come to me with a lot of programming experience and some have none.

For 6th grade, I found a great EV3 curriculum that really pulled in a lot of higher-level curricular concepts.  The cost for the program was only $20 and can be purchased here.  This is a 10-week course, but it works out great because my students will be able to pick up where they left off once their science and social studies' teacher begin using the EV3s.

For the first lesson, the students had to use basic programming to conduct a bunch of tests (how far it goes in 2 seconds, 2 degrees, 2 rotations).  It led them to analyzing circumference (a new topic for all) and using the circumference to figure out how far/long it will take to get to an endpoint.  After experimenting with this, the students were challenged with getting their robot to travel in a figure 8.  We had many variations of an 8 - see the example video below.


After that lesson, the students then took a ton of data on how far it traveled at different power levels over .5 second intervals.  They graphed their results and were able to make predictions based on their data.

I really liked the pacing of this course and I thought it was a great transition from 5th grade into 6th grade robotics.  The one other big change I made over last year was to find a simpler robot design. Last year, it took us about two class periods to build.  The design they made this year was just as good, but only took about 20-30 minutes, which gave more time for programming.

Let me know if you have any questions about the EV3s.  They would make great Christmas gifts.

Here's to STEM!
Mrs. Giran

Sunday, September 21, 2014

3D for Kids


Do you know what this is?  After an amazing assembly called 3D for Kids, I am now proud to say that all of my students can answer this question.   For the answer, please click here.

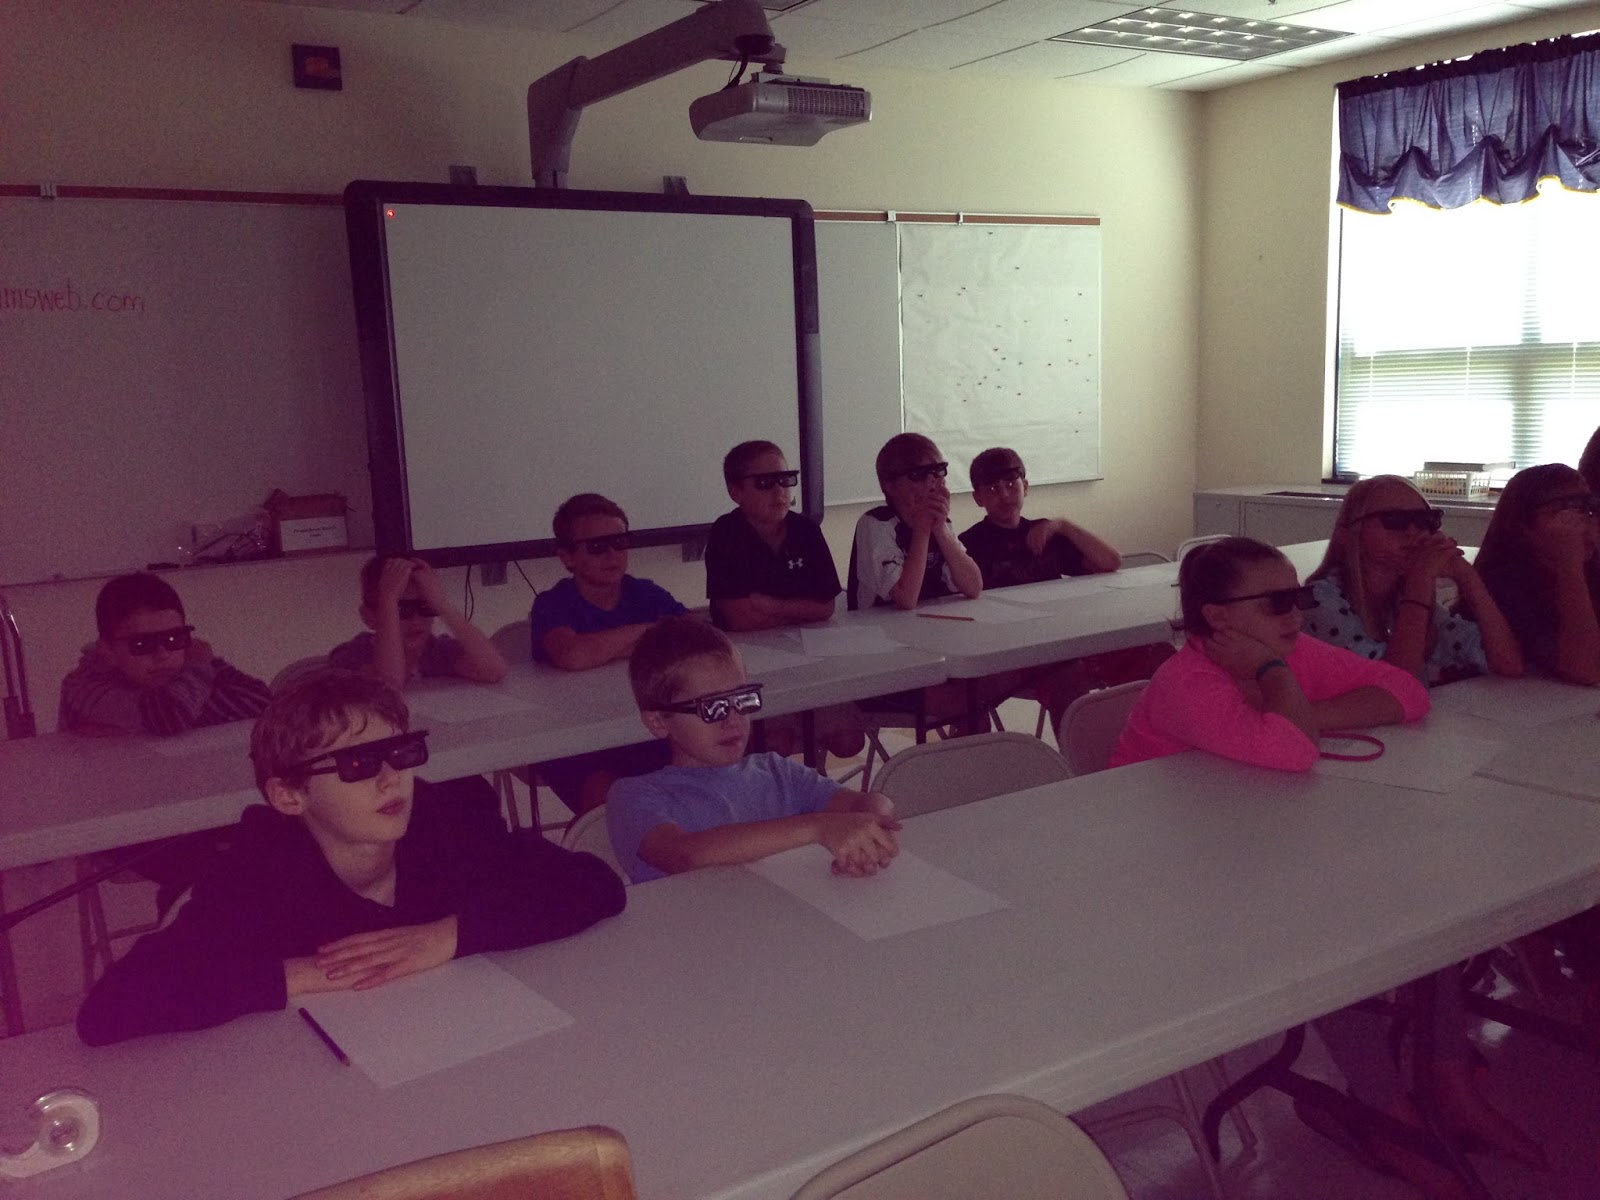
This past Friday, we had the very fortunate opportunity of having Jeff Boller, an award-winning filmmaker, come to our school to speak to us about the science behind 3D.  In order to keep the group sizes small, 5th grade came to one session and 6th came to another.

During the presentation, students learned how to take photos, make videos, and draw in 3D.  Everything was done using a hands-on approach and my students were enthralled for the full hour.  This presentation was so good that it even kept my attention for both sessions.  Nobody wanted it to end!

Jeff explained how and why 3D works by using simple materials (tinsel garland, cardboard cutouts, and homemade sandwich board-style signs).  The presentation began with Jeff taking two photos of the groups to show
them how to turn a regular photo into 3D.  Next, the students created a Jurassic Park themed video and learned about the Spielberg Face (look it up on YouTube - so funny!).  Jeff also showed the students the role of a dolly grip.  After learning how to draw in 3D, we were able to watch one of the music videos that Jeff created titled, "A Geek Like Me."  He is very talented and I loved it when I heard some of my students humming along.


This presentation was the perfect fit for my students.  I have a few who are very interested in video creation and others would like to be animators when they are older.  3D for Kids exposed everyone to another STEM field and took their limited knowledge of how 3D works to a whole new level.

As a teacher, I really enjoyed the follow-up that Jeff provided me with.  He sent a link to the pictures and videos he took for me to pass on to my students.  They are able to view everything in 3D with the glasses he gave each of them.  He also gave me some ideas of how to extend his presentation into my classroom.  I would definitely give this 2 thumbs up!

Grab your 3D glasses and check out our videos, by going to this link.  You can compare the video on this page to the 3D version.  You can also get more information about Jeff and his 3D for Kids presentation here. 

Thanks, Jeff!!

Here's to STEM!
Mrs. Giran

Wednesday, September 17, 2014

Musical Straws

This STEM Design challenge was a lot of fun...and very noisy. The challenge posed to the students was, in their groups, they had to play a basic song using straws that were turned into an instrument. The students started the lesson by discussing what a reed's purpose is in a musical instrument. The conversation went great because many of my students are in band. Words like volume, pitch, and vibrations were used without me having to prompt the class.

After the discussion, students were shown how to cut the straw into a point. They them had to figure out how to blow into it to make a kazoo sound. This sounds easier than it actually was. Some figured it out right away, while others took a while. Even the band students had some difficulty.  I love it when simple challenges don't come easy because my students then have to adapt and persevere. Once they figured out the right technique, it was like riding a bike and the noise began.

Students received additional straws to cut and "play" so they could determine how the length of the straw changed the pitch. Once each group had a variety of straw lengths, the challenged continued. I saw many wonderful techniques. Some groups were writing down the "notes" to play along with, others were grouping straws together by length and playing that way.  One group even had a conductor who pointed at the person who should be playing the note.

We heard "Hot Cross Buns," "Twinkle Twinkle Little Star," and "Old McDonald."  Some groups decided to create an original song as time was running out.

Overall, the lesson was effective. Through a hands-on design challenge, the students were able to meet my learning target which was, "I can explain how a reed works by monitoring the effects of straw length and pitch."  The students were laughing, having super discussions, and learning scientific concepts all while rising up to a challenge that, at the beginning, caused frustration.

One important note - keep your door closed and warn your fellow teachers that musical straws will be taking place. One teacher told me that at first she thought the sound was a baby crying and then when she peeked into the hall, she realized it was coming from my room!


Here's to STEM!
Mrs. Giran

Wednesday, September 3, 2014

Can You Save Fred??

While searching for a good lesson that would allow me to introduce the Engineering Design Process, I came across the "Can You Save Fred" activity.  I told the students that my friend, Fred (who happens to be a worm) enjoys boating, but never learned how to swim.  The problem is his boat capsized and, because worms have small brains and aren't too smart, he didn't have his life preserver on.  It (gummy Lifesaver) became lodged under the boat (plastic cup).  The challenge for the students was to get the life preserver out and place it around Fred so he could swim to shore.  The catch?  They could only touch the materials with paperclips. 

I had the students working in groups of 3 and they each had one paperclip.  This activity began with an explanation of our learning target, "Through inquiry, I can identify the steps to the Engineering Design Process."  We broke the target apart and discussed what inquiry is and how it would look in a classroom.  The students then began the task of saving Fred.

I have to say that my classroom became quite loud, although the students were on task the entire time.  I even had one teacher stop in to see what the excitement was all about.  He made the comment that it was true active learning.  The students were planning out their moves and, most importantly, discussing how to improve what they were doing.  Eventually, all groups were successful and very excited to pose for a picture of Fred.


While a simple activity, there was a lot of learning going on.  After having the students both draw and write out the steps they went through, we compared this to the steps of the Engineering Design Challenge: Ask, Imagine, Plan, Create, Improve.  They were able to identify the phases they experienced and relate them back to the EDP. 

We once again reviewed our learning target and determined  that we did reach it and more because we could not only identify the steps, but explain how they are used in the real world. 

Many great discussions came up from what a real scientist does, to how the EDP can be used in writing and science.  I look forward to more of these discussions throughout the year.  It was a great day in our classroom!

Here's to STEM!
Mrs. Giran

Sunday, August 24, 2014

QR We?


With school back in session, many teachers scour the internet to find icebreakers that will allow the students get to know each other.  Because my students will eventually all end up working with one another, I was trying to think of a way to do something that could go across class periods.  That's when I thought of using QR codes.

On the first day of class, I had the students come up with 5 good interview questions that would get the interviewee really thinking.  We discussed how to turn a typical question that would yield a one word response into an open-ended question that would really let us know more about the person.  After they had prepared their questions, they tried them out on me to see if I was forced to answer in sentences, instead of one word.

The following day, the students were randomly paired up with each other and recorded the interviews with our iPads.  They uploaded the videos to their Google Drives and shared them with me.  I turned each interview into a QR code, which I printed out with the student's name underneath.  We placed all of them on the board in my room so the students are able to scan the codes and hear the interviews of all my students.  They really like seeing the interviews of the students who aren't in their classes.  It turned out to be a great way to get to know each other.  Parents will also be able to view these videos at Open House, so they can see the students in action without the students having to be there.


QR codes are something that I hope to use more in my classroom.  In fact, the students have already started giving me more ideas on how they think they should be used.

Do you use QR codes or have any suggestions on different ways they can be used in the classroom?  Let me know!

Here's to STEM!
Mrs. Giran

Sunday, August 10, 2014

Helpful Teacher Websites

If you are like me, I am sure your email inbox explodes with numerous websites claiming to be a teacher's best friend.  Many times, you glance at the information and bookmark the link to take a look at later.  Unfortunately, later often never comes. 

I want to share two sites that did grab my attention amidst their claims to helping organize my classroom.  I have since put both into practice and am very happy with the way things are going.

Appointy:
Appointy is an online appointment scheduler.  While set up for businesses, I started using this site to streamline how my GIEP meeting scheduling process.  The site allows a user to create open appointments and then provides you with a link to send out.  I was able to block off half hour time slots over the course of a week to schedule my GIEP meetings.  Parents signed in with Facebook, Google, or an Appointy account.  They were able to see what times were available and schedule a meeting at their leisure.  I was sent confirmation emails when an appointment was made.  I am able to log on and see who is scheduled when and what slots are still open.  Appointy even sends out reminder emails 48 hours before the scheduled meeting.  You can customize the information that you would like parents to complete when scheduling.  It has saved me a lot of time because we normally scheduled these through email.  I am using the free account and everything I need is available.  I have not looked into the paid accounts, because I haven't come across needing something that isn't available.

VolunteerSpot:
This is a teacher's dream website.  Long gone are the times where I have to manually keep track of volunteers or items that are to be donated.  VolunteerSpot does this all for me.  My students run a school store and I always have one parent there monitoring the sales.  This website allowed me to post the details and times that I needed volunteers and it keeps track of who has committed.  Parents are able to switch times with each other, without me getting involved.  It even keeps a database of volunteers' names and email addresses in case I need to quickly contact someone.  You can also use this site to post items that are needed for the classroom.  Parents can go on to your site and sign up to send something in.  Duplicate items are a thing of the past!  The free account allows you to have up to 30 events going on at a time.  A paid account gives you more events and the option to collect money for things such as field trips.  I definitely plan on using this when I am seeking out volunteers for the Science Olympiad that I organize.  With over 140 volunteers, this site is sure to relieve some of my anxiety.  :)

As I use these sites in new ways, I will be sure to post.

Here's to STEM!
Mrs. Giran

Sunday, August 3, 2014

Shark Tank

This past year I was trying to think of a way to turn our school store into more of a learning experience.  I wanted to come up with a way that would teach my students lifelong lessons, while being interactive with the entire school.  This led to creating our school's own version of Shark Tank.


The creativity of our students always amazes me.  Shark Tank allows the students to invent their own product with the hope of selling it in our store.  The student inventors receive a loan that is paid out in real money.  At the end of the selling period, all money made is added up, the loan deducted and then the profits are split 50/50 with the school store and the seller.

The process is as follows:

1. Students complete an application that provides information such as the product's name, the sales price, and how much of a loan is required.  The students also have to obtain a parent signature on the application page.  Applications were due the 1st of every month to be considered.

2. My Shark Tank student committee meet and go through the applications narrowing them down to the top five ideas.  Letters are sent out to those students stating that the Shark Tank is interested in hearing more about the product and assigns the students a day when they are to present to the committee, which is made up of eight students, two parents, and one employee from our local credit union.

3. On the day of the presentations, the selected students are given five minutes to pitch their ideas.  Many students bring in samples for the committee.  We even had some students create jingles, wear matching shirts, and act out skits.  At this presentation, the Shark Tank committee is able to ask questions and see firsthand what the product is like.  The committee members fill out a rubric/information sheet while the presentations are occurring.  They then take the score sheets home and figure out the potential profit for each product.  Finally, the students vote whether or not they believe we should offer this in our store.  Each chosen item is sold for six days.

4.  Once the products are selected, the students are given their loan and assigned days to work in the store.  After the sales are over, the school store manager pays out the profits to the student sellers.

Some examples of items selected and sold are: mystery boxes (take out containers that hold a mystery prize), homemade tie-dyed socks, Glow Goo that never dries out, cake pops, duct tape and Rainbow Loom accessories.  The average price was $1, with the most expensive item being sold for $5.

The part of this that I enjoyed the most was seeing my students grow throughout the year.  At the beginning, the committee was not very open-minded about the products.  If they personally didn't care for the items, they would vote no.  As the year progressed, the students were always trying to figure out what product would pull in the most profit for the store and not worrying about it they liked it themselves.  Also, I had a guest speaker come in from the credit union to talk about how banks determines who can get a loan.  They discussed credit scores, high and low risk loans, as well as basic banking principles.

The school really enjoyed this process.  Student inventors were able to showcase their items and possibly earn real money.  The presentations also improved as the year went on because the competitive nature became greater.  This is one "project" I will continue during the upcoming year.

Here's to STEM!
Mrs. Giran